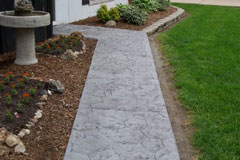
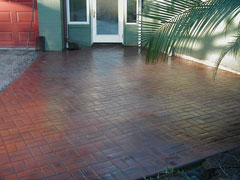
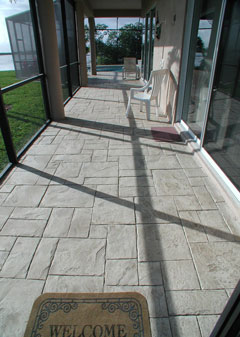
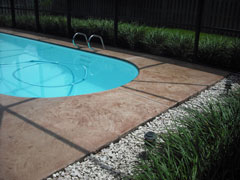
Specifications
Renew-Crete® Stamped Overlay is installed by adding a thin overlay on the existing surface. To ensure good bonding, the existing surface must be well prepared before the overlay is applied. In most cases, the surface is first roughened using grinders and washed with high-pressure water jets. Cleaning agents such as detergent, bleach, degreaser, detergent, or chemical stripping agents are used to thoroughly clean the surface where required.
After the surface is thoroughly washed, the Renew-Crete® Bond Coat, a special cementitious bonding layer, is applied. This is followed by the application of Renew-Crete® Stamp Mix, on which the stamping will be done to create the desired patterns and textures. Control and expansion joints are cut after the concrete overlay has hardened. Finally, the new surface is sealed using Renew-Crete® Sealer to protect the surface from daily wear and tear besides giving it a glossy finish.
Surface Preparation
Outdoors:
It is recommended that the substrate be waterblasted with a min of 3000 PSI.
Oil stained concrete should be cleaned thoroughly by using a pressure washer with a degreaser or stripper if necessary. Etch the surface using 1 part acid to 4 parts water. Neutralise with an ammonia or baking soda and water solution, rinse throughly and allow to dry.
Indoors:
If acid etching is not possible then it is recommended that indoor concrete be shot blasted or mechanically abraded. After the etching, the floor should be washed with a degreaser or detergent and rinsed thoroughly.
Crack Repair
Crack repair is an essential part of a successful resurface application. If proper crack repair is not performed the cracks will transfer into the new surface. Repair all cracks before resurfacing the concrete.
Using a hand grinder with a diamond crack wheel, chase the crack and widen.
Using a straight blade again, chase the crack in the botton of the 'V' shoving the blade as deep as you can to remove any weak areas.
Blow it out and acid etch with a 2-1 acid soultion and rinse thoroughly.
Using a blower and a heat gun, force dry the crack until all water is removed.
Using Renew-Crete crack repair epoxy, paint the sides of the crack.
Add clean dry sand to the balance of the epoxy until it thickens, pour it down into the crack and smooth with a putty knife on both sides of the crack.
While the epoxy is still soft, trowel in the crack mesh tape and insure that it is covered with epoxy and worked into it well. Make sure that the mesh is completely covered by the epoxy.
While the epoxy is still tacky sprinkle sand over it to give the sproay coat something to grip to.
After the epoxy has dried, blow off the excess sand and use bond coat to make a small batch to trowel down over the repaired crack about 6-8 inches to either side feathering down.
Be sure to allow a minimum of 8 hours for the epoxy to dry before feathering out with bond coat.
Mixing Instruction - 6 to 12mm Stamping
A bond coat/squeegee mix must be put down in front of stamp mix. The bond coat/squeegee mix is generally mixed in a 20 litre bucket while stamp mix is mixed in a mortar mixer.
Bond coat mix:
Using a 20 litre pail, mix 5.7 litres of water with 1 bag of Renew-Crete bond coat mix.
Stamp mix:
Using a 20 litre pail, mix 5.25 litres of water with 1/2 a bag of Stamp Mix. Add 18 kg of sand and mix well.
Using a mortar mixer: For each bag of Stamp Mix add:
10.5 litres of water
One 18 kg bag of stamp mix
Mix on low speed for 2 minutes
Slowly add sand into the mixer while still mixing - 36kg if stamping at 6 mm and 45 kg if stamping at 12 mm.
Leave to mix on low-medium speed for 2-5 minutes or until thoroughly mixed.
DO NOT OVER MIX THE PRODUCT ON HIGH SPEEDS.
Application Instruction
Mist the surface with water prior to applying the bond coat/squeegee mix.
Apply bond coat/squeegee mix using a squeegee or trowel. Spread on amounts of the mix that can be covered with stamp mix without drying. Apply stamp mix immediately over a wet bond coat/squeegee mix using a wheelbarrow.
Spread stamp mix using a gauge rake set at the desired thickness. Once leveled, smooth out with a trowel.
Do not wait too long before smoothing as the overlay will form a skin that will make it hard to finish after about 15-20 minutes. Be careful not to create thin and thick areas. Light ridges or trowel marks should stamp out. Be sure to clean tools often as build up on them makes finishing harder.
Build up and smooth out edges with excess stamp min, Edge by holding a square finish trowel against edge of concrete and running a concrete edge over it or cut the edge at a 45 degree angle with a trowel after stamping had be done while material is still soft.
Make sure edge along weed forms properly to keep concrete fron sticking to form when taken off. All expansion and control joints must be honored. Generally expansion and control joints are filled with bond coat mix during application and saw cut with diamond blade within 24 hours. Make sure that saw cut is deep enough to go all the way through stamp mix in joint and into existing concrete joint and all expansions goints are cleaned out and edges cut to a 45 degree angle.
Before starting to stamp, spray stamps and area with liquid release. Do not spray too far in front of where you are working or you will need to re-apply the liquid release.
Start stamping as soon as you can get out on stamps without the stamps sliding. Do not allow to dry enough where a pounder must be forced heavily on the stamps in order to make an impression. You will acheive best results by stamping when soft enough to walk on the stamps. Do not worry about double lines and excess material between stamps when stamping this can be cleaned the following day before antiquating and sealing.
Detailing
Detailing is easiest before the overlay reaches 24 hours.
Using hand tools and chisels or a grinder, detail all joints where imperfections show.
Re-cut all control joints and expansion joints. Insure that you cut all the way through to the original saw cut.
For easier detailing we recommend you use our line of diamond detail wheels on a 4-1/2" grinder.
Rinse of area throughly after detailing.
Antiquating
Colour Wash Antiquating:
Antiquating should be done after all saw cuts, joints and excess material have been cleaned up, and the area rinsed clean.
Each job should be completely antiquated at one time rather than in sections to insure a more uniform application.
This method may also be used to even out colorus between pours on stamped concrete.
Mix 1 - 8 oz cup Colour Wash with 4 Gallons of clean water.
Dampen surface, no standing water.
Apply antique solution generously with a watering can. Shake the can often to insure settling does not occur.
The antique/accent colour will build up into the joints and low-lying areas, creating a 2-tone look.
Let the surface dry completely. When completely dry, the surface will have a dull
chalky/powdery look.
Using a paint roller with extension handle & a 1/4" nap roller, roll the surface to until desired look is achieved.
Be sure to be consistent in amount of rolling from area to area.
Blow area off thoroughly.
Mist the entire area with water to see the resulting antique effect. The antiquated area will look like the finished product while it is still wet.
Allow to dry completely. Spray or roll 2-3 even coats of Renew-Crete Sealer (do not allow to puddle) when
dry re-apply, wait approximately 15-30 minutes between coats.
If a slip resistant finish is required we recommend Renew-Grip be added into the second to last coat of sealer.
Note: If the antique/accent colour is not what you are looking for, just wash it off (Must be done within 3 hours of
application). Insure that you are not wearing black rubber soled shoes when walking on the surface when sealing as
the solvents will dissolve the rubber and leave black marks.
Antique Sealing:
This is a permanent colouring process and very hard to remove. Always make a sample first.
Mix Hi-Gloss Sealer 50-50 with acetone in a separate container.
Add 1-2 cups of coloured powder release agent for every 5 gallons of diluted solution. Mix completely.
To avoid glogs, use a paint filter when filling your sprayer unit.
Spray liberally onto surface (avoiding runs) the colourant will well up in the low areas and joints.
Allow to dry completely (about 20-30 minutes), then spray or roll with 2 coats of undiluted sealer.
If a slip resistant surface is required we recommend Renew-Grip be added into the second to last coat of sealer.
Note: Always measure all materials to insure uniformity.
Coverage
Concentrated Stamp Mix: 1-18.1 kg Bag to 9.5 litres of clean water and 36 kg clean dry sand and 2 Color Packs covers 6.5 square meters @ 6 mm or 4 square meters @ 10 mm.
Stamp Mix: 1-25 kg Bag to 4.75 litres of clean water and 1 Color Pack covers 3.25 square meters @ 6 mm or 2 square meters @ 10 mm.