Specifications
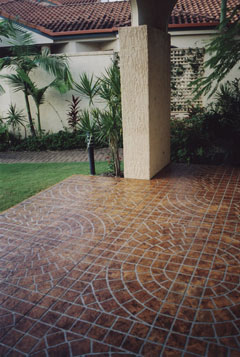
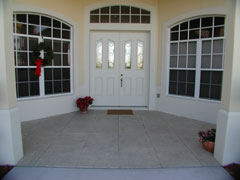
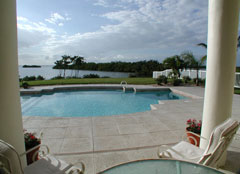
Renew-Crete® Stamped Concrete is installed on freshly poured concrete. The concrete is then stamped using Renew-Crete® stamping tools to create the desired patterns and textures. After the concrete surface has dried, control and expansion joints are cut to prevent pre-mature cracking. Finally, the new surface is sealed using Renew-Crete® Sealer to protect the surface and giving it a gloss finish.
Detailing
Detailing is easiest before the concrete reaches 24 hours.
Using hand tools and chisels or a grinder, detail all joints where imperfections show.
Re-cut all control joints and expansion joints. Insure that you cut all the way through to the original saw cut.
For easier detailing we recommend you use our line of diamond detail wheels on a 4-1/2" grinder.
Rinse of area throughly after detailing.
Colouring / Antiquating
Colour Hardner:
After fresh concrete is poured, the Renew-Crete® dry-shake colour hardener is applied onto the wet concrete surface. The colour hardener conditions the surface for imprinting and also increases the strength and durability of the concrete besides providing a base colour for the design. Dry shake colour hardeners colour the surface (top 2mm – 5mm) of a concrete slab only.
Integral Colouring:
When added to concrete, integral colouring admixture will give the entire concrete surface a consistent colour. Using intergral colouring is more convenient and less labour-intensive. It is simply mixed into the concrete. The colour is permanent and will remain even if the concrete’s surface is scraped or chipped.
Colour Wash Antiquating:
Antiquating should be done after all saw cuts, joints and excess material have been cleaned up, and the area rinsed clean.
Each job should be completely antiquated at one time rather than in sections to insure a more uniform application.
This method may also be used to even out colorus between pours on stamped concrete.
Mix 1 - 8 oz cup Colour Wash with 15 litres of clean water.
Dampen surface, no standing water.
Apply antique solution generously with a watering can. Shake the can often to insure settling does not occur.
The antique/accent colour will build up into the joints and low-lying areas, creating a 2-tone look.
Let the surface dry completely. When completely dry, the surface will have a dull
chalky/powdery look.
Using a paint roller with extension handle & a 1/4" nap roller, roll the surface to until desired look is achieved.
Be sure to be consistent in amount of rolling from area to area.
Blow area off thoroughly.
Mist the entire area with water to see the resulting antique effect. The antiquated area will look like the finished product while it is still wet.
Allow to dry completely. Spray or roll 2-3 even coats of Renew-Crete Sealer (do not allow to puddle) when
dry re-apply, wait approximately 15-30 minutes between coats.
If a slip resistant finish is required we recommend Renew-Grip be added into the second to last coat of sealer.
Note: If the antique/accent colour is not what you are looking for, just wash it off (Must be done within 3 hours of
application). Insure that you are not wearing black rubber soled shoes when walking on the surface when sealing as
the solvents will dissolve the rubber and leave black marks.
Antique Sealing:
This is a permanent colouring process and very hard to remove. Always make a sample first.
Mix Hi-Gloss Sealer 50-50 with acetone in a separate container.
Add 1-2 cups of coloured powder release agent for every 18 litres of diluted solution. Mix completely.
To avoid glogs, use a paint filter when filling your sprayer unit.
Spray liberally onto surface (avoiding runs) the colourant will well up in the low areas and joints.
Allow to dry completely (about 20-30 minutes), then spray or roll with 2 coats of undiluted sealer.
If a slip resistant surface is required we recommend Renew-Grip be added into the second to last coat of sealer.
Note: Always measure all materials to insure uniformity.